Sunday, April 28, 2013

SNEAKY PEEKY and it's SO BRIGHT

It's Sneaky Peek time!
May's Stamp Set:
Future's So Bright is going to LIGHT THE WAY for sure! Chock full of coordinating stamps, 12 total.

Also Coming May 1st:
Full Reveal of the New Stamp Set Release
6 NEW Digital Products you are just going to LOVE!
 and...
We loved her so much this month, she's joining our team.
We're welcoming Amy Tsuruta to the Avocado Arts Family
Check out our AMAZING Team all month in May!
1st: 

2nd: 
Our Guest Designer 
(May is Tessa Wise)

3rd: 

8th: 
Our Guest Designer
(May is Tessa Wise)

10th: 

12th: 

15th: 

18th: 

21st: 
Teri Anderson 

28th
SNEAK PEEK
 of JUNE
    

Friday, April 26, 2013

Great inspiration from Kelli


This is Kelli Hull.   
She is an Avocado Arts club member 
and joined our club the very first month 
we launched in May 2011.  


Kelli and I :)

More importantly, Kelli has become a good friend of mine.  I have had the opportunity to be in her area for a couple Scrapbook Expo shows and she has been kind enough to come and help me in our booth.  She is sweet, kind, giving and also very talented.  Kelli launched a blog of her own "Stamping with a Dream".  She is one creative gal and does an amazing job with our stamps ;)  Check her out!!

Recently, Kelli decided to submit some projects for the Paper Crafts Stamping Royalty contest.  (She is already royalty in my opinion ;).  Last night, she shared one of the cards with me that she submitted and it showcased our recent stamp set "Special Delivery".  I absolutely love it and wanted to share it with all of you:


How cute is this??  
Love the coloring skills Kelli and the layout of this card!!  
Simply adorable-you are a stamping queen ;) 
Keep up the awesome work...big hugs friend!

Wednesday, April 24, 2013

Kit Club with a KICK


The amazing folks at the Weekly Scrapper (weeklyscrapper.com) are featuring us on their blog showcasing our stamp club and our new digital offerings.


You can check the article ouHERE

We're super excited about it.
If you're going to be in Orlando, FL for the Scrapbook Expo show...we are offering 4 classes (including a card class, layout class, mini album class and folder class, make-n-takes, show specials and more!!  

COME AND SEE US THERE!!

Sunday, April 21, 2013

Teri Anderson is Rockin' it Perfectly Planted Style TODAY

Teri Anderson is making this Sunday GREAT with her signature HAPPY style.
 
You gotta love Teri. True Blue. Amazing style. Inspiration a plenty! Happy Sunday!

Thursday, April 18, 2013

We're MOXIE FABbin'

Moxie Fab World We're up on the Moxie Fab Blog today! 
Go give them some love for a chance to win 5 of our favorite sets. We love Moxie Fab and Paper Crafts Mag!
Thanks Cath!
Go, give them some love for a chance to win these five fabby stamp sets.


We are Stampin' with Julie. Cmon' In!

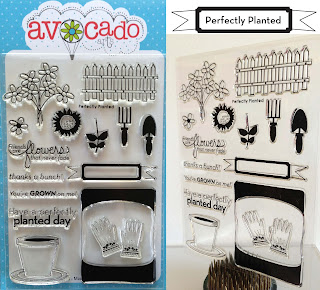
Julie Masse is making THURSDAY CREATIVE month's release Perfectly Planted.
 
You will be inspired. You're jaw will drop and you'll want to start creating right away. Just sayin'... three amazing projects you don't want to miss.

Monday, April 15, 2013

Cristal Hobbs is Sharing Her Creative Style TODAY!

Cristal Hobbs is joining us today with 
some AMAZING project inspiration using this month's release Perfectly Planted.
Cristal is super creative with layers of loveliness and super fun projects. She'll make you see crafty in a whole new light.
 
Three amazing projects you don't want to miss.

Saturday, April 13, 2013

Saturday Project Inspiration!

Super Simple Card in Minutes!
White Cardstock
Little Bit of Twine
Copic Markers
Black Ink 
and
Imagine the POSSIBILITIES!
Happy Saturday!

Cristal Hobbs will be starting our 
week off with FABULOUS projects. 
MONDAY!

Friday, April 12, 2013

Kit Club with KICK!

The amazing folks at the Weekly Scrapper (weeklyscrapper.com) are featuring us on their blog showcasing our stamp club and our new digital offerings.


You can check the article out HERE

We're super excited about it.
If you're going to be in Orlando, FL for the Scrapbook Expo show...we are offering 4 classes (including a card class, layout class, mini album class and folder class, make-n-takes, show specials and more!!  

COME AND SEE US THERE!!

She's Got some Crafty Goodies to Share!

 
Connie Mercer is joining us today with 
some AMAZING project inspiration using this month's release Perfectly Planted.
If you know Connie's work, it's all scrappy and vintagey and jaw dropping. Check out here amazing style and THREE super cool projects right HERE
 
Happy Friday!

Wednesday, April 10, 2013

Kelley is Bringing Perfectly Planted Inspiration Today!

Kelley Eubanks is joining us today with 
MORE
Perfectly Planted Inspiration? 
Kelley has created THREE amazing projects to share today. 
You don't want to miss all the goodness!
using our April RELEASE
Check out Kelley's Projects Here!

Did you see our big product release on the 1st?
Check it out!

Monday, April 8, 2013

Monday with Amy Tsuruta! Fabulous Project Inspiration!


Amy Tsuruta is back with us today!
She has another amazing project to share. 
Check out today's inspiration HERE!

If you missed her post with us on the 2nd. You can see it HERE.

Kelley Eubanks and Connie Mercer
are also sharing amazing projects this week!

Lot's of amazing projects to share with week!
Did you see our NEW PRODUCT RELEASE?
Check it our HERE! 


Friday, April 5, 2013

Let's Canvas Create, shall we?

Happy Friday!
Today, we've got a little CANVAS CREATING! to share with ALL NEW Product!
Ready for some fun?
3x9 Canvas
Here's how it all came together!
Gather supplies: Mod Podge or Gel Matte Medium, a canvas, print out the Sunflower Digital Patterned Paper. I find that Gel Matte Medium is my favorite to work with. It's less streaky than Mod Podge. Speed up the drying process by using a heat tool. You can cut the paper to fit the canvas and trim or sand away any extra that may hand over the edges.
Any kind of white tissue paper will work. Collaging the tissue paper on top of the patterned paper gives you more texture and helps tone down some of the color. You can also add a bit of gesso or white acrylic paint into the glue to give it a little more color. Resist the urge to smooth out the tissue paper. It leaves nice texture when dry. Speed up drying by using a heat tool. You can burn the paper if you get too close. Just sayin' been there!
When stamping the fence image, be sure to use an archival ink or staz on, so it won't bleed when you put the glue over top. Freestyle tear the tissue and adhere it to the canvas at the bottom. Put gel matte medium on the canvas and over top the fence stamped tissue.
Cut the sunflower stamped images into strips and adhere one to the top of the canvas and one to the bottom. Open up the digital die cut file in the software that works with your digital die cut machine and prepare the file for cutting. Just move the other elements in the file (seed packed card and frame) to the side. You can enlarge the flowers if you'd like. I just cut them as is. Load your cutter with your favorite cardstock or other mediume (vinyl, paper, etc.) I used a transparency! It cut perfectly. Be sure to check the settings on your software for cutting different mediums. This was cut on a Silhouette Cameo, I used the Stencil Setting with the blade depth at 5. I laid the transparency sheet right on the cutting mat.
Color up the flower transparency cut. I used BLACK Archival ink for quick and easy application. Now it's time to cut the flower pot from the coordinating digital die cut set that works with the Perfectly Planted stamp set. Open up the entire file and ungroup. Move everything over the side so that the flower pot is the only image on the cutting matte surface in the software.  I loaded the digital patterned paper I had left over after I put some on the canvas into my Silhouette and cut the FLOWER POT image. In the software, you can remove the center cut that is in the flower pot by clicking on "release compound path" and ungroup. You can used the digital patterned paper in your favorite die cutting machines with your dies, too! Super simple, Print, Cut and GET GOIN' on creating something fun!

Using the coordinating flower pot stamp... stamp the image right on to the flower pot die cut you just made. PERFECTLY perfect paper piecing and no fussy cutting. Go back to the digital die cuts you placed off to the side and grab the banner image. You can remove the center lines of the banner die cut, by clicking on "release compound path" and ungroup. The cool thing about this banner... it coordinates with the stamp. However, what's even cooler.... is that you can enlarge it to make it far bigger and use it with the other sentiments in the set. That's what I did here.
Adhere all the digital elements to the canvas and you are done! I whipped this us in about an hour. Super fun!. The frame and ribbon at the top give the canvas a little extra color pot. Using left over paper, I cut a little 2x2 piece, put it in the little frame and adhered the whole thing to the canvas. More dimension. Stamp the sentiment and flowers on the banner and adhere to the frame. MORE DIMENSION. I used E6000 glue to hold the frame and transparency image down on the canvas.
Here's what was used in the canvas project.
You can purchase it HERE


So many possibilities! So many cool things you can create with the stamps and digital products.

We'd love to see what you create!
Share it with us on our FACEBOOK page.
Happy Friday!
-Lisa

Thursday, April 4, 2013

It's a Fabulous Thursday full of inspiration with Ashley Harris!

It's the Perfect Thursday for some rockin' project inspiration.
 
Ashley is sharing THREE
PERFECT Projects today
using our April RELEASE
Check out Ashley's Projects HERE!
She's amazingsauce, isn't she?

If you missed Tenia Nelson's project inspiration from yesterday! Be sure to check her out too!


Wednesday, April 3, 2013

Tenia Nelson is Planted on the Blog Today! Check it!

Ready for some more 
Perfectly Planted Inspiration? 
Tenia has created THREE amazing projects to share today. 
You don't want to miss all the goodness!
using our April RELEASE
Check out Tenia's Projects HERE!

Did you see our big product release on the 1st?
Check it out!

Tuesday, April 2, 2013

We're MIXING it up with our NEW PAINTABLE product!

So, what do you think of our new product line?
Did you see it?
Here's our POST LAUNCH if you missed it!

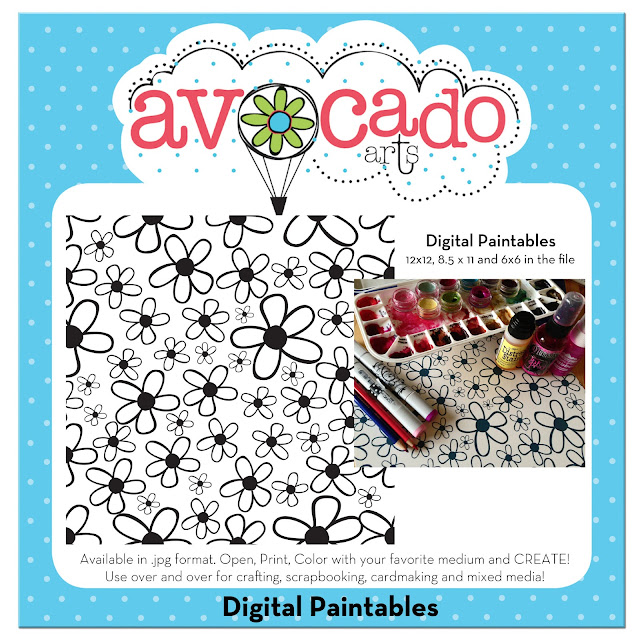
Let's talk Mixed Media and get a little messy with our NEW Paintables.

How about a little tutorial?
One of my favorite art journaling techniques is
IMAGE TRANSFER.

The NEW Paintables are perfect for this technique.
Check it out!
You can click on the tutorial pics to make them BIGGER!

Get your Art Journal out and get ready to CREATE!
Using Gel Matte Medium, you can TRANSFER the Paintable print out right into your journal.

The Gel Matte Medium helps to transfer the printed image right into your journal. This step takes time. Pulling the paper bits off takes a little patience. I tend to leave a lot on. It gives the page added texture.
Once completely dry, draw something on top. I used the BIG daisy as the focal point to draw into the girl's hair. I just built the face and shoulders around her and let the hair flow naturally.
Final Page of Happiness ...
To cover up areas of the daisy I didn't want to see, I just painted Gesso around her face. If you look closely, some of the daisies still appear on her skin. I liked the effect, so I left it. I repeated the transfer again on the left hand sized and sanded it a bit for more rough texture. Check out all the flowers from the Perfectly Planted set and Thoughts and Smiles set. See the gate at the bottom of the page and the label image from Perfectly Planted on the right. Happy. Happy. Happy. Page.
NEW Digital Paintables!
Print. Paint. Create!
Colorful Possibilities Await!
Stay tuned tomorrow for 
TENIA NELSON
and here fabulous projects using
Perfectly Planted
Check it!
-Lisa